

A worthwhile project? Yes. Time consuming? Kinda. Will I do it again? Probably.
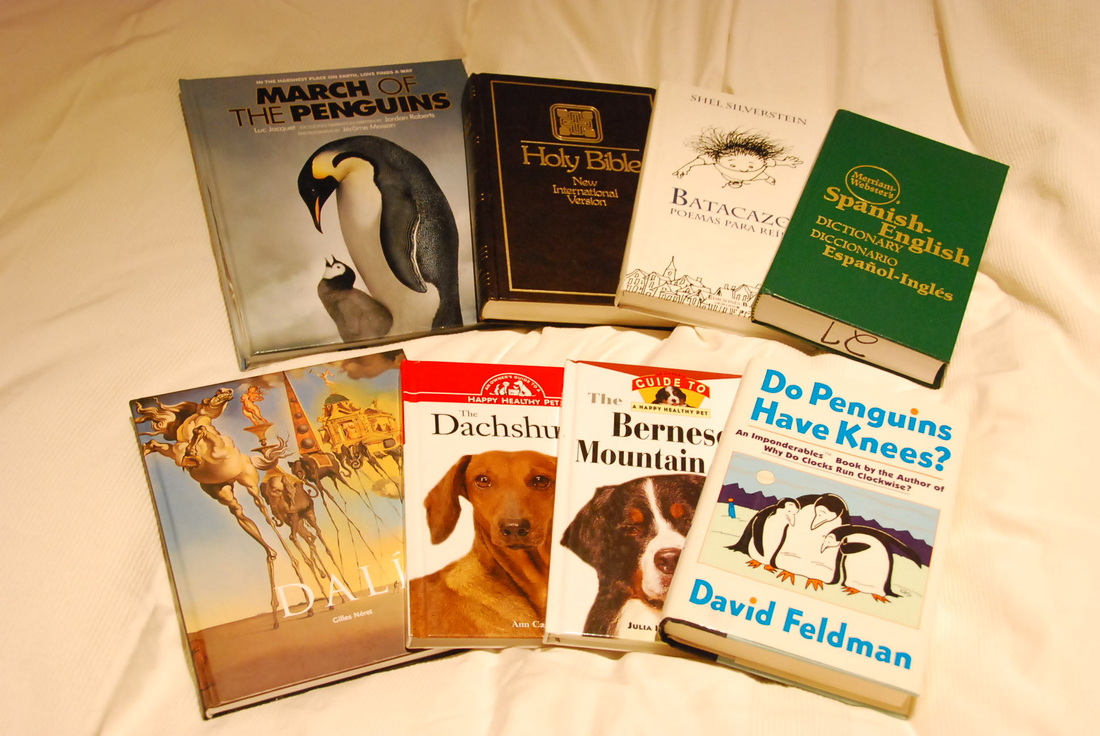
This Christmas I chose to recover some used books I picked up at McKay's Bookstore in Nashville for a dear friend of mine. Certainly a personal gift as each book was specifically chosen for her.
We are both big fans of Restoration Hardware and their canvas-covered books they have on display. I took a hint and chose to do the same, but actually glue the canvas to the books instead of simply wrapping the books for looks... Read on to see how I did it.
We are both big fans of Restoration Hardware and their canvas-covered books they have on display. I took a hint and chose to do the same, but actually glue the canvas to the books instead of simply wrapping the books for looks... Read on to see how I did it.
Having never done this before, I did a quick online search on "Book binding" as a guide. It turns out that the pages are sewn together and then simply attached to the hard cover by a little glue along the spine and the inside cover pages on both the front and the back.
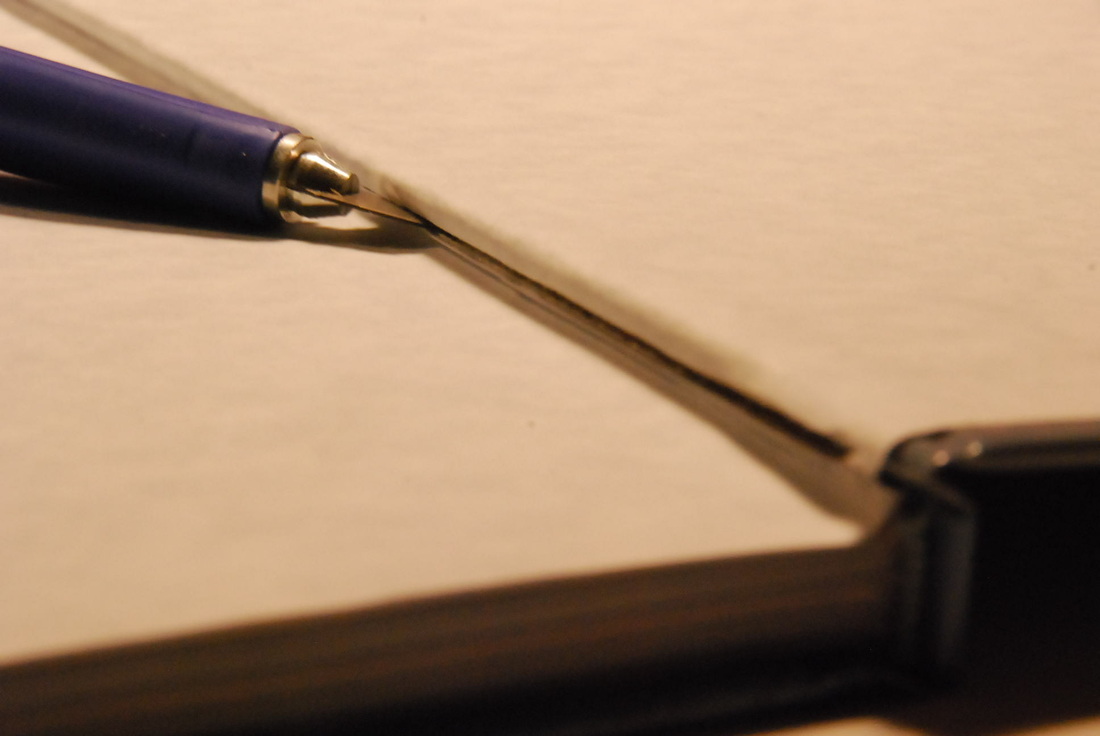
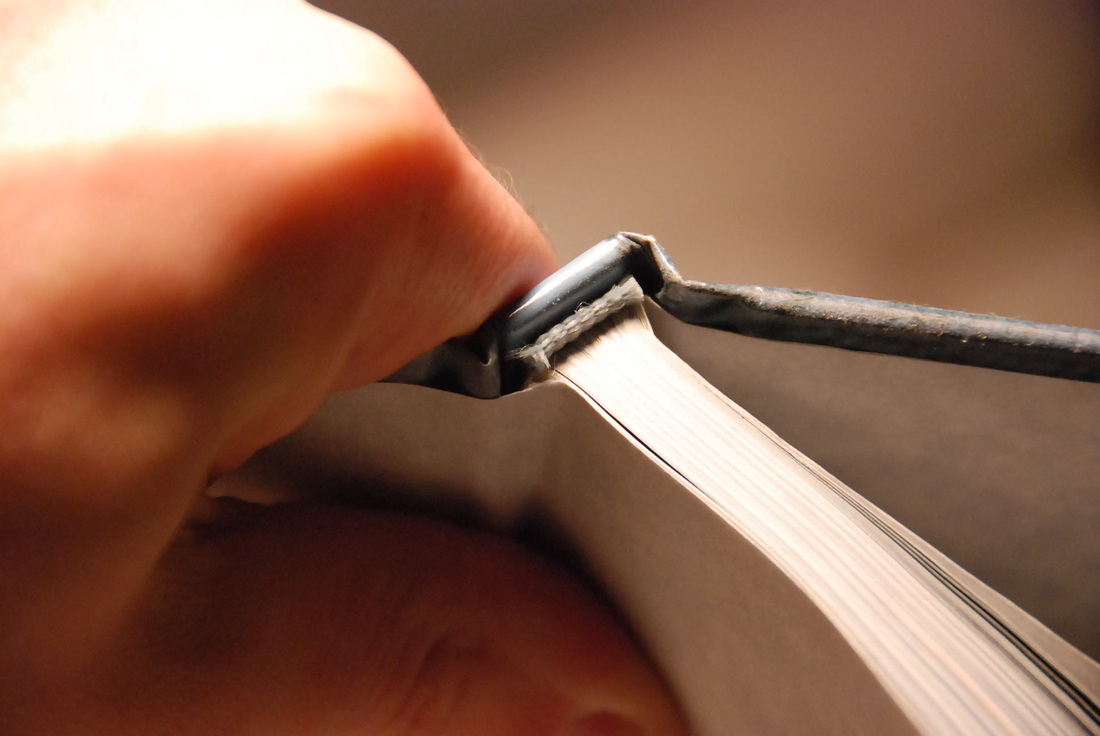
Step 1: All you gotta do to separate the pages from the cover is slice this piece of paper along the inside crease of the book.
I used an Xacto knife (as shown here) on some of the books and a normal pair of scissors on the others. I honestly think the scissors were easier. Just open them wide, like you were cutting open a box from UPS.
I used an Xacto knife (as shown here) on some of the books and a normal pair of scissors on the others. I honestly think the scissors were easier. Just open them wide, like you were cutting open a box from UPS.
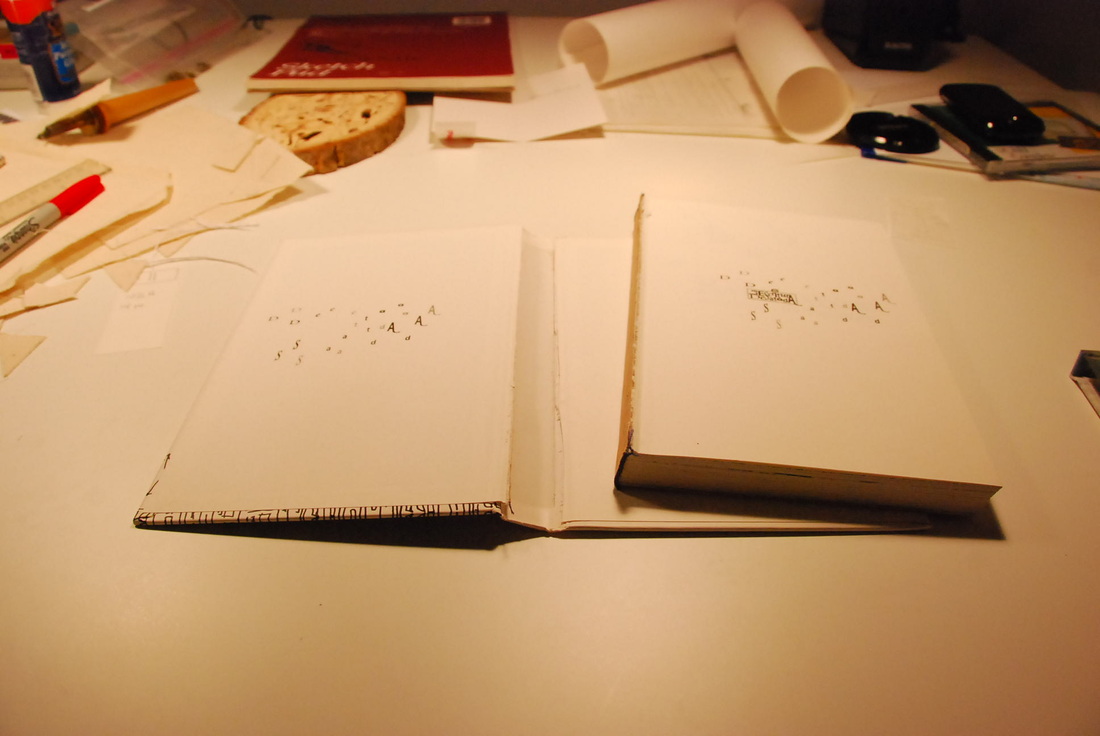
It's pretty neat to have a book apart on your desk, albeit nerve-wracking on your first try.
Step 2: Place the book cover on the canvas and mark the corners.
When I mocked up the first one, I figured out that I needed about 3/4" all the way around the cover to allow for proper glueing surface area.
You can see here that the book cover is 3/4" from the bottom and the right side of the canvas.
When I mocked up the first one, I figured out that I needed about 3/4" all the way around the cover to allow for proper glueing surface area.
You can see here that the book cover is 3/4" from the bottom and the right side of the canvas.
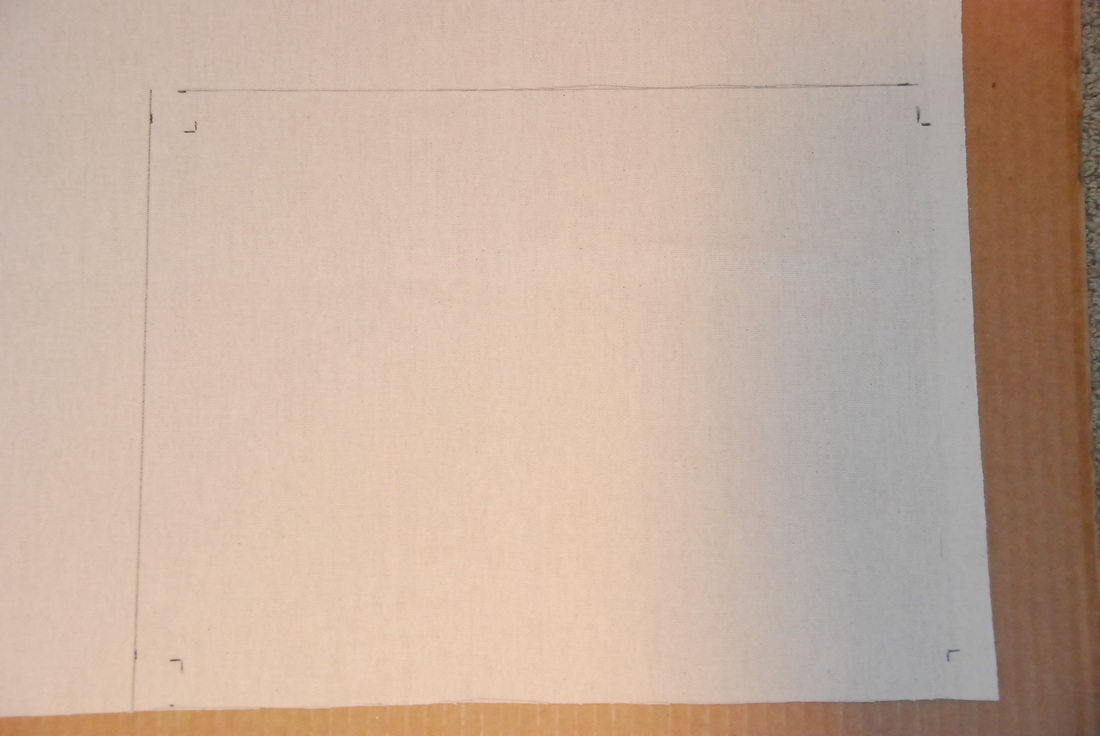
Step 3: Once the corners are marked, go back and measure 3/4" further out in all directions.
Since I started 3/4" from the bottom and the right, I just had to go 3/4" from the left and top.
Step 4: Cut it out!
Since I started 3/4" from the bottom and the right, I just had to go 3/4" from the left and top.
Step 4: Cut it out!
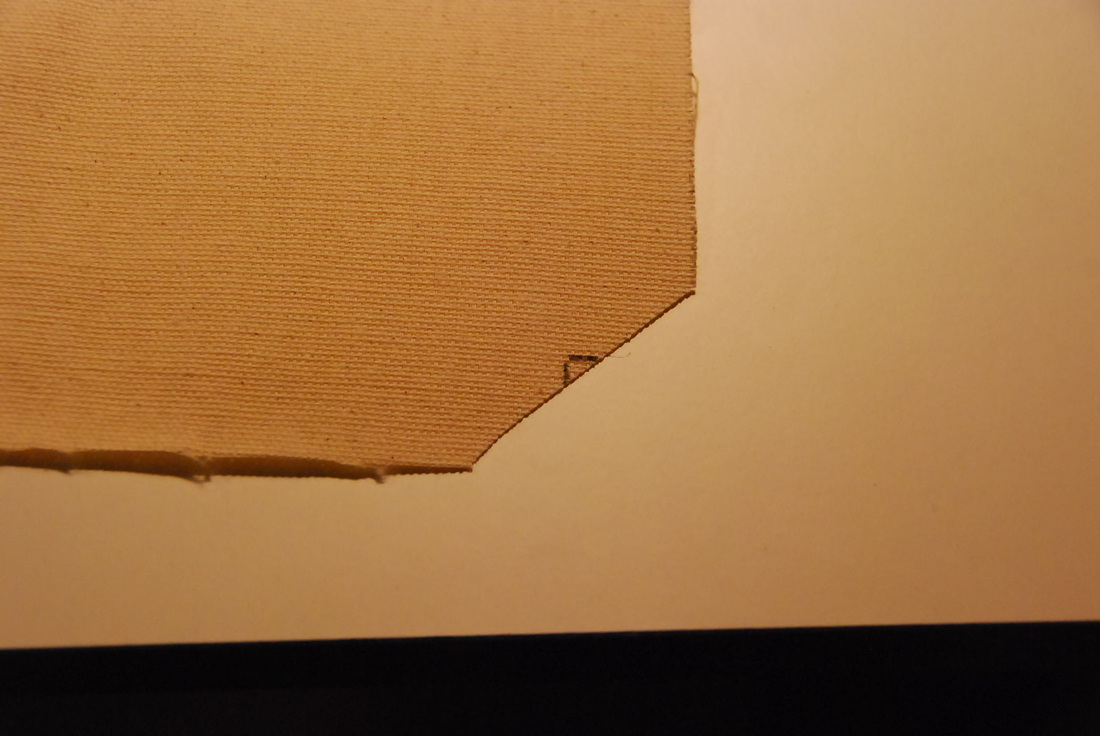
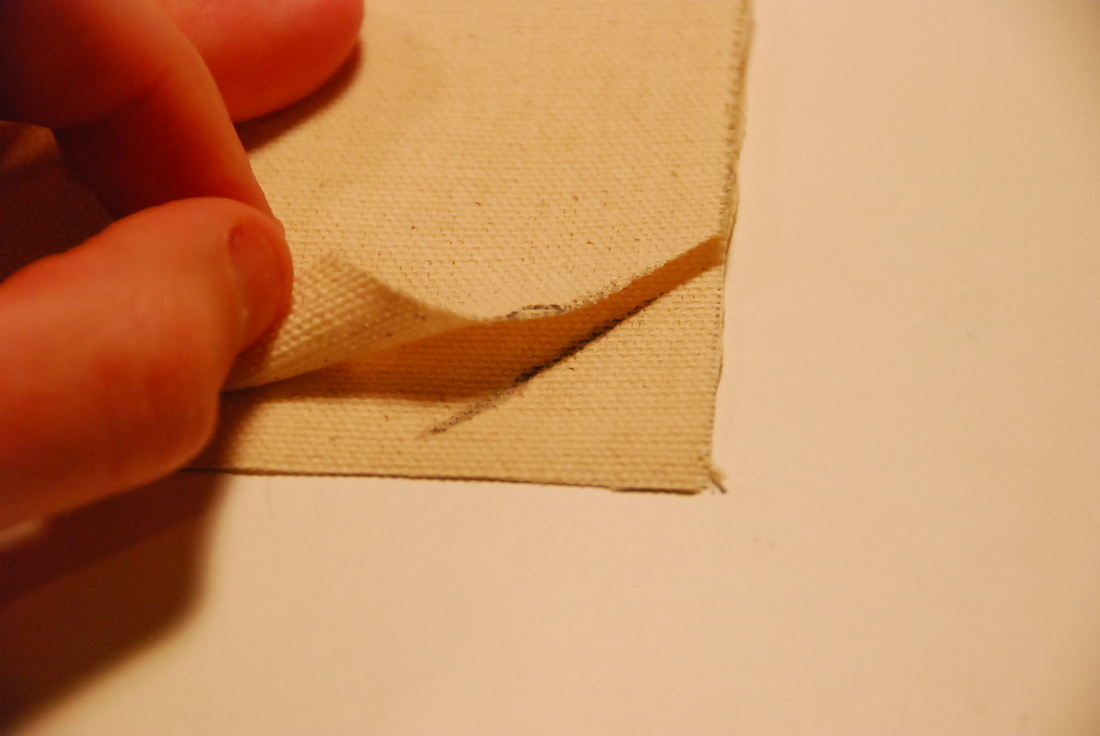
Step 5: Once you have your piece of canvas cut to size, snip the corners at a 45º angle, just outside the corner marks.
This will make sense when you fold the flaps over on the cover and glue them down. The edges from the pieces you just cut will line up more or less perfectly.
This will make sense when you fold the flaps over on the cover and glue them down. The edges from the pieces you just cut will line up more or less perfectly.
Now at this stage, hopefully you won't have to do what I had to do... and that is do everything twice.
I ordered my canvas online from Fashion Fabrics Club, an excellent online retailer for all things fabric. They had two types of canvas in different weights: a 7.5oz. version and a 10oz. version. I called them to see if the 7.5oz stuff was see-through at all and they said it wasn't. Great! That's what I ordered, thinking the lighter-weight material would wrap better and not be so chunky around the corners.
False. It was see-through, at least a little. If I doubled it up though, it was fine. (Fortunately,) I accidentally ordered much more canvas than I needed, so I just cut two pieces for every book cover. I can't attest for the see-throughness of the 10oz kind, but I would try going with that if I were you... moving on!
False. It was see-through, at least a little. If I doubled it up though, it was fine. (Fortunately,) I accidentally ordered much more canvas than I needed, so I just cut two pieces for every book cover. I can't attest for the see-throughness of the 10oz kind, but I would try going with that if I were you... moving on!
(Step 6: Do steps 3-5 again.)

While mocking things up some more, I realized I needed a strip of canvas to cover the ugly cut lines I made when separating the pages from the cover.
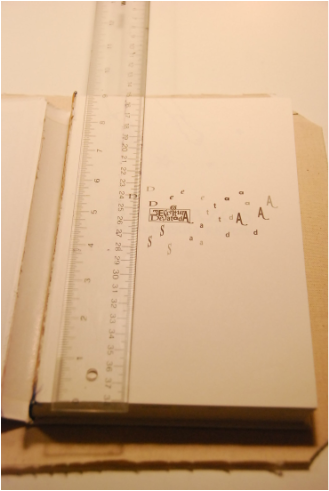
Step 7: Measure the length of the pages to get the size of this strip.
My ruler is 15" long and about 1.5" wide, so I just placed my ruler down on the canvas and cut pieces that were that wide and as long as I needed them to be.
My ruler is 15" long and about 1.5" wide, so I just placed my ruler down on the canvas and cut pieces that were that wide and as long as I needed them to be.
 |  |
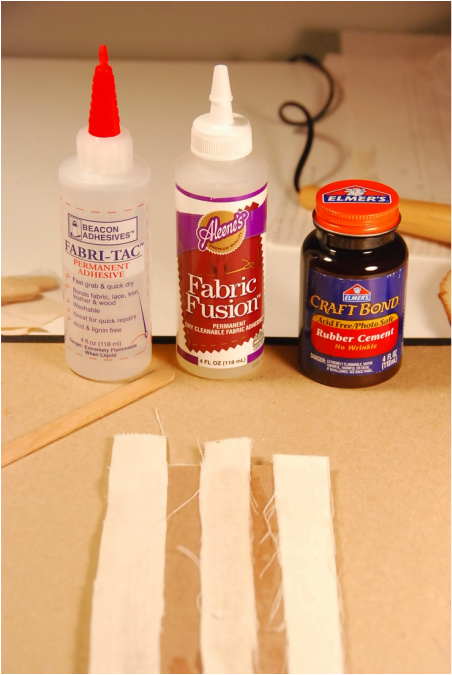
I went to WalMart and picked up some glue for this project. I had no idea what would be best so I grabbed a few.
Rubber Cement = don't use.
Fabri-Tac and Fabric Fusion both dry clear and will not budge. Fabri-Tac is much stickier than Fabric Fusion and good for things that need to be held down while you quickly glue the rest (i.e. the long sides of the book cover). Fabric Fusion is great for pieces that may need to be moved a little when glueing them down (i.e. the strips to cover the cut lines I made earlier).
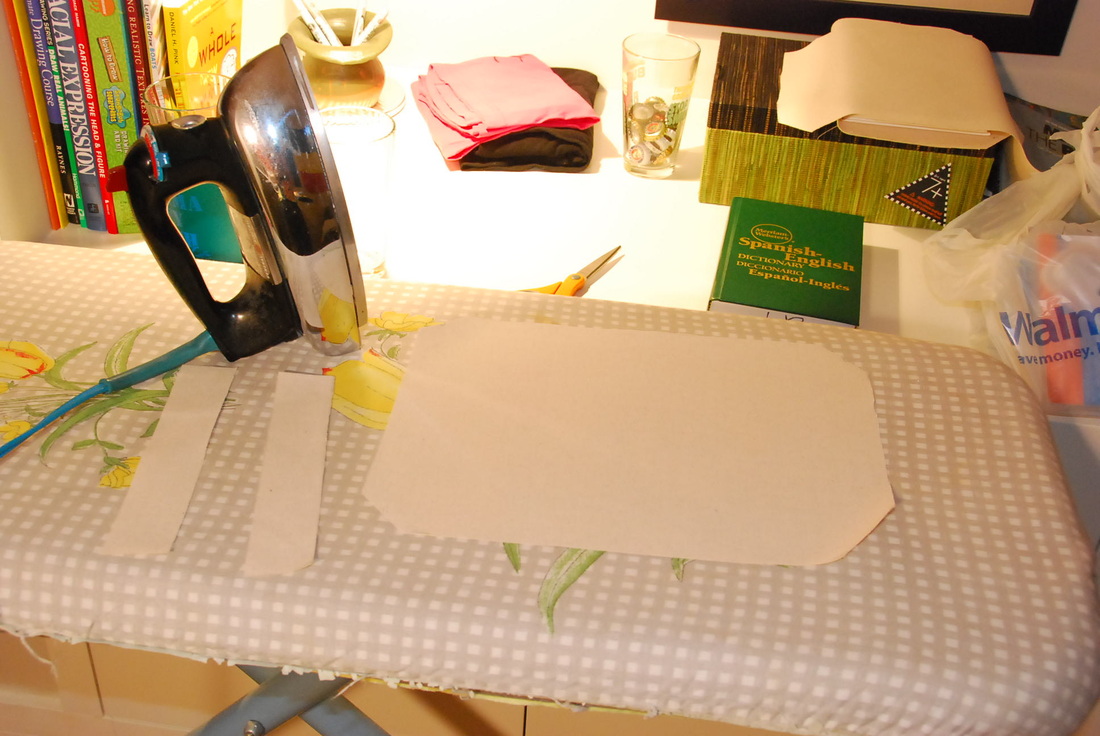
Step 8: Since the canvas was shipped to my house, it was kinda wrinkly. I busted out the iron to take care of this - mark'd difference! So pro!
Step 9: Place the book cover on the ironed canvas piece and line up the corners again.
Step 10: Lay down some glue along the edges of the canvas in a zig-zag fashion.
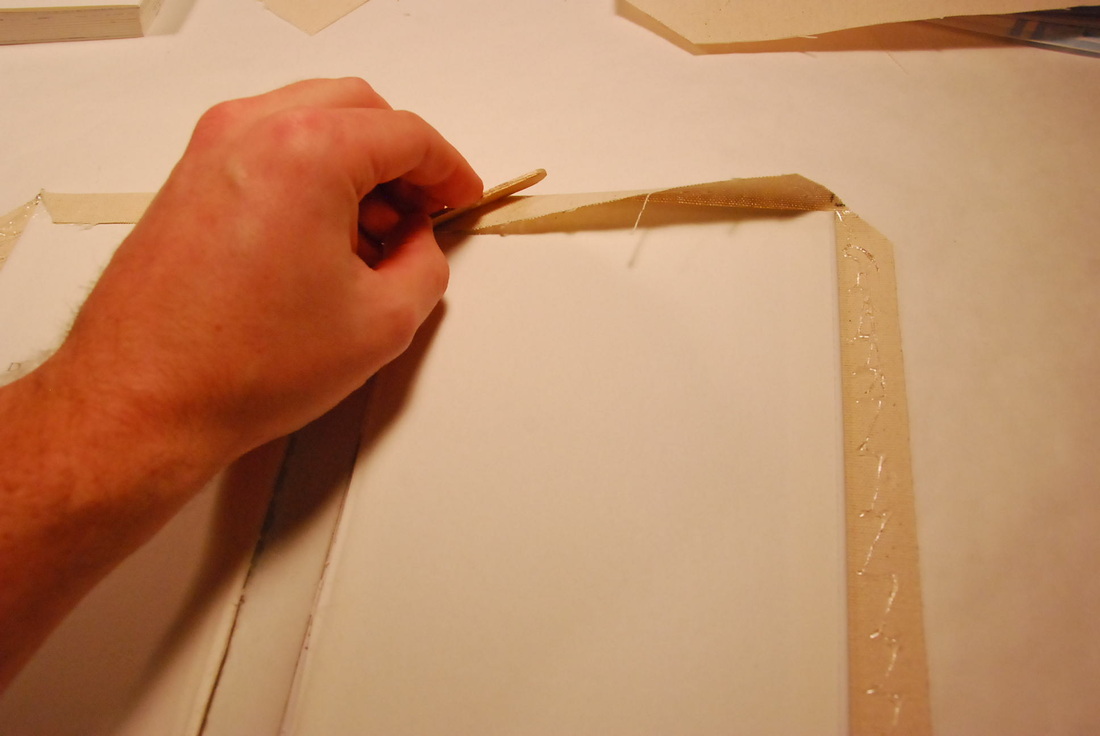
Step 11: Fold the canvas over the edge of the book cover and spread out the glue to the edge. Wipe off the excess, however this won't matter much, as we will cover this up.
I took some popsicle sticks and broke them in half to be my glue spreaders.
I took some popsicle sticks and broke them in half to be my glue spreaders.
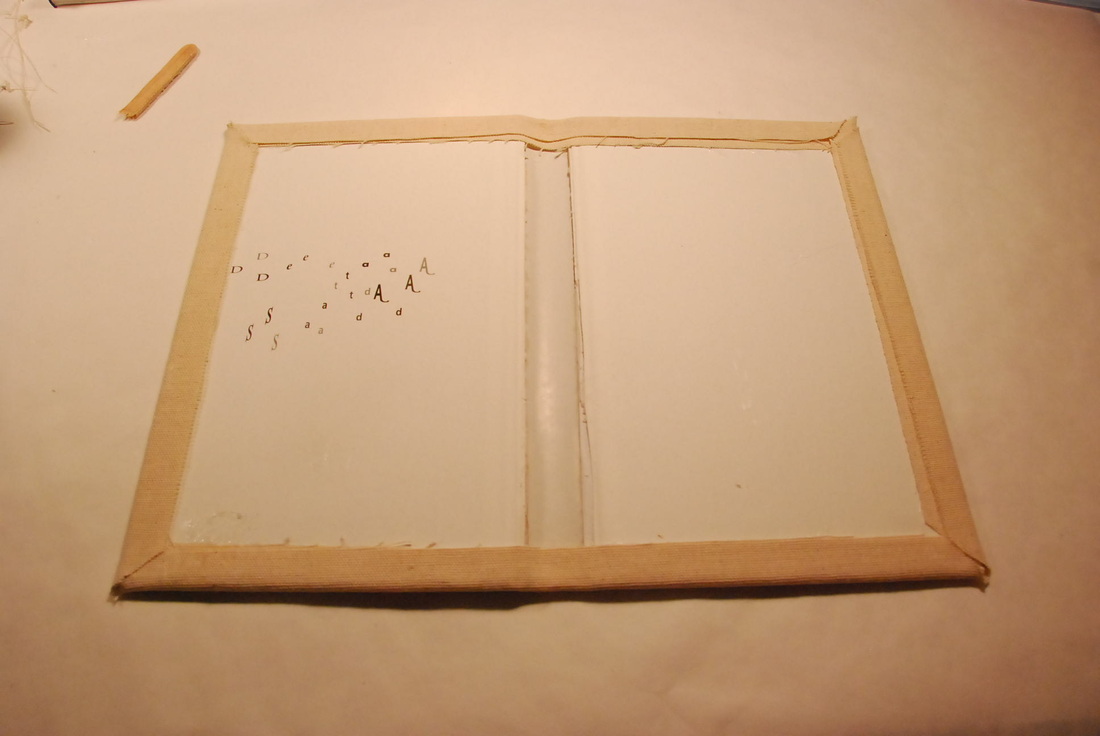
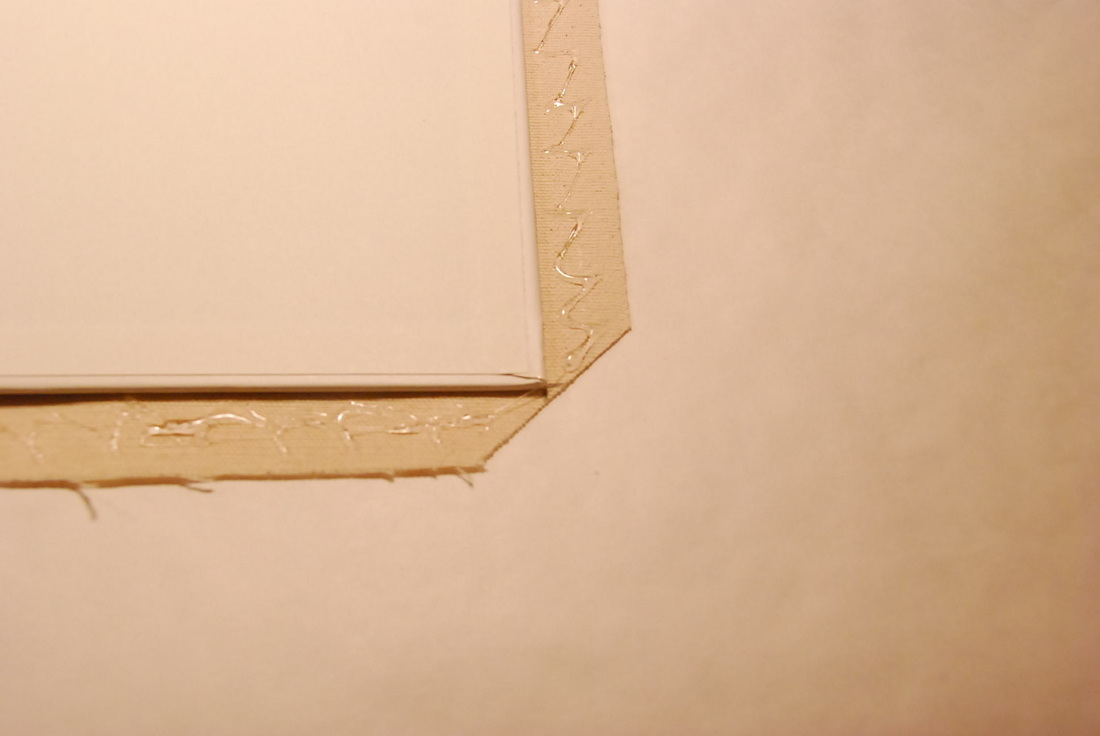
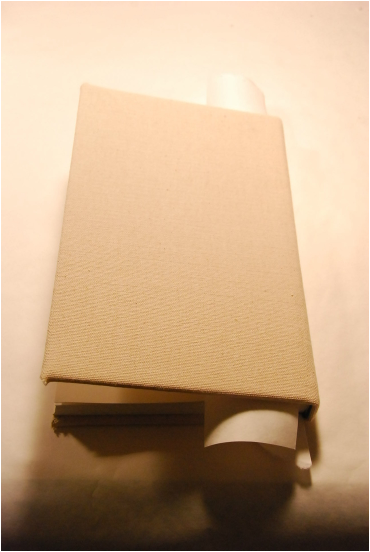
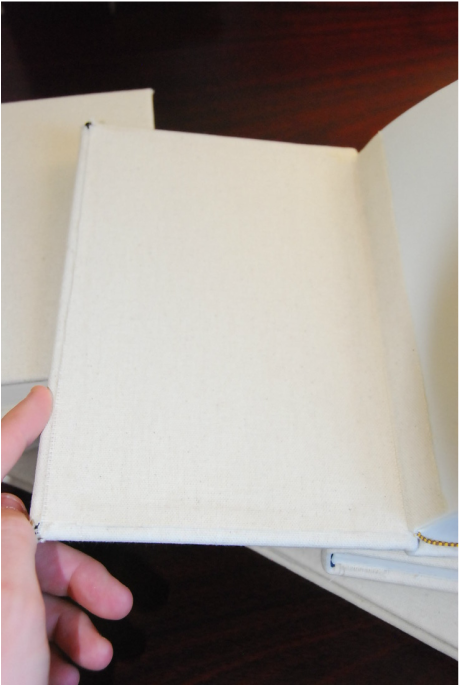
Done with the two layers of the canvas job!
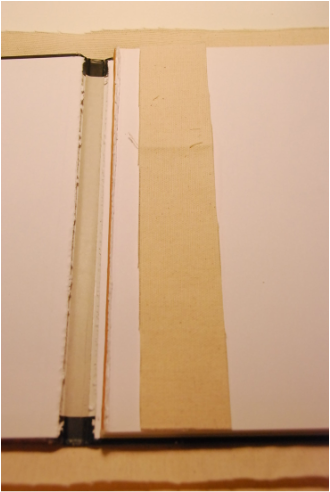
Notice the corners and how the canvas meets up to cover them.
Notice the corners and how the canvas meets up to cover them.
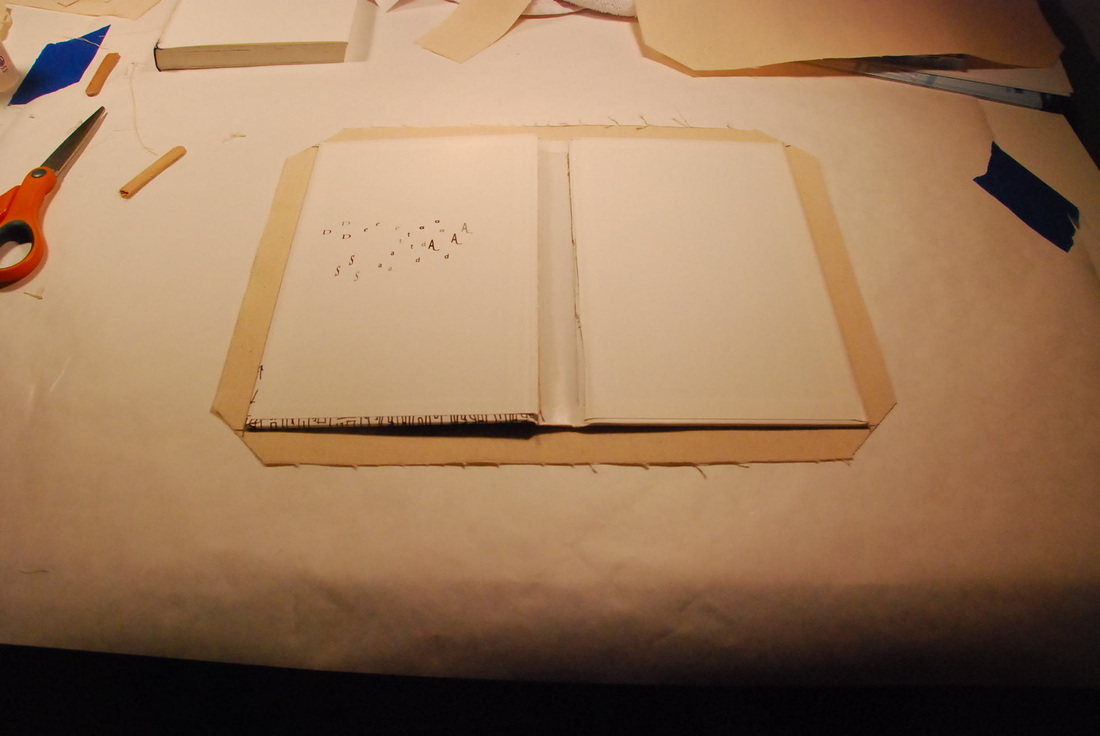
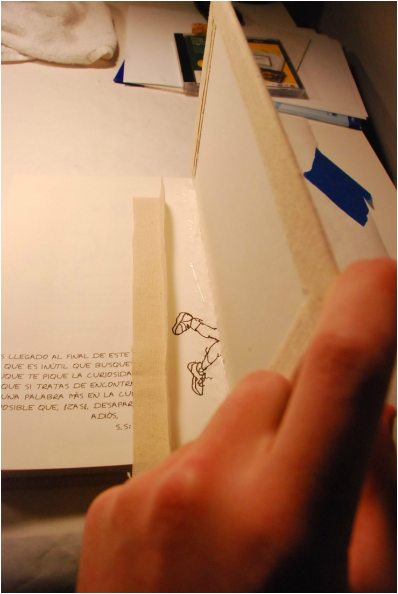
Step 12: Glue the pages back to the cover. Use the same zig-zag pattern for the glue.
Fold up the sides of the book at the same time to make sure the pages are centered in the fold. Also, push the pages back against the binding to make sure the glue is squished een thur reel good.
Fold up the sides of the book at the same time to make sure the pages are centered in the fold. Also, push the pages back against the binding to make sure the glue is squished een thur reel good.

Step 13: Take those "hider" strips and fold them in half long-ways, aka. "hotdog style" if you're still in 1st grade.
This will make it easier to get it to fit right in the crease of the book.
This will make it easier to get it to fit right in the crease of the book.
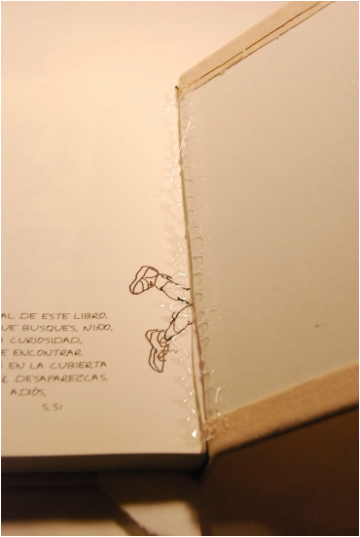
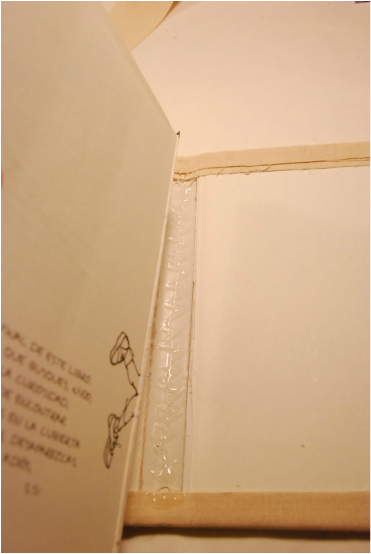
Step 14: Glue the crease in preparation for the "hider" strip. Make sure to get it on both the cover and facing page.
Step 15: Hold the cover at 90º to the pages and place the "hider" strip in the corner. Use a popsicle stick piece to spread the glue out again. Wiping off the excess is a little more critical this time.
Step 16: I put some paper strips in between to keep everything from sticking together.
In retrospect, I should have used something else, like a long piece of plastic. The paper ripped a little and got stuck to the residual glue.
In retrospect, I should have used something else, like a long piece of plastic. The paper ripped a little and got stuck to the residual glue.
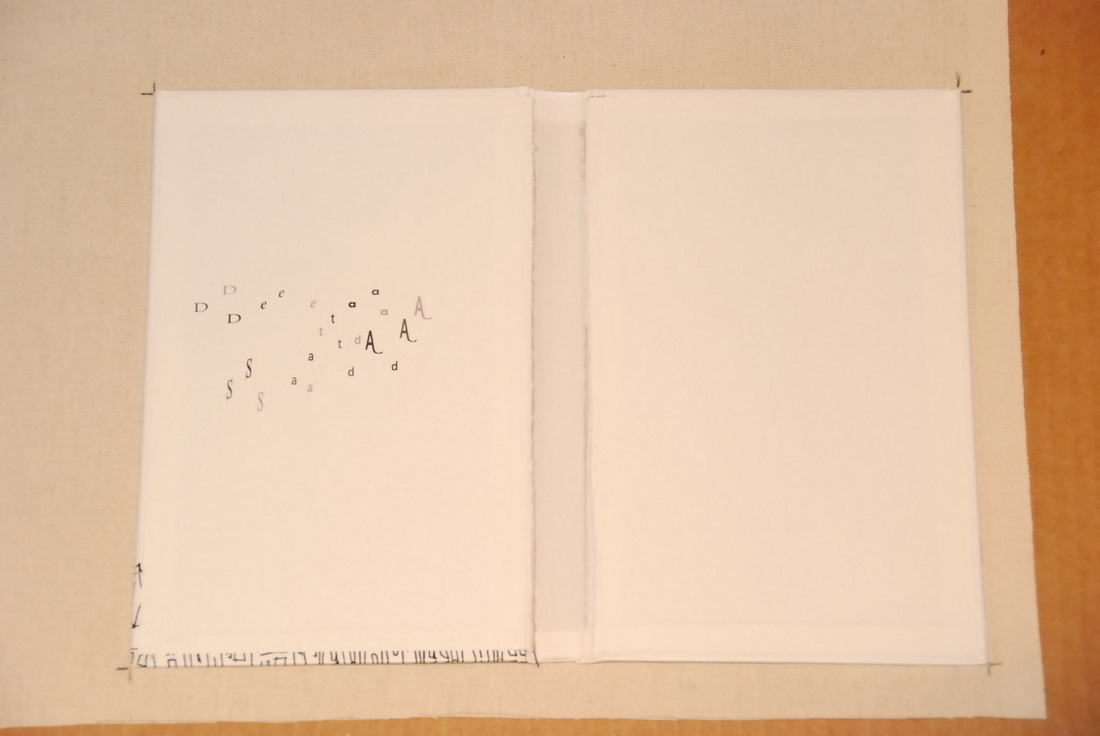
Step 17: To finish it off, I cut an additional piece of canvas to fit the entire inside cover to hide any ugly edges or stray glue bits.
I did this for both the front and back of each book.
I did this for both the front and back of each book.
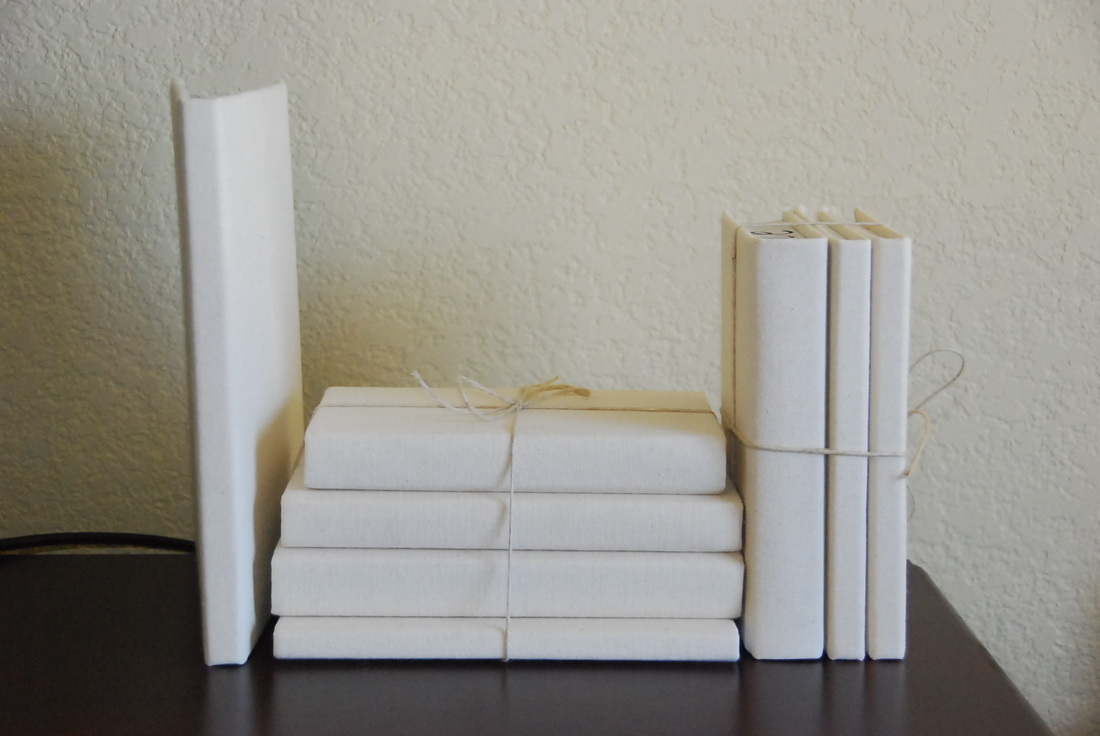
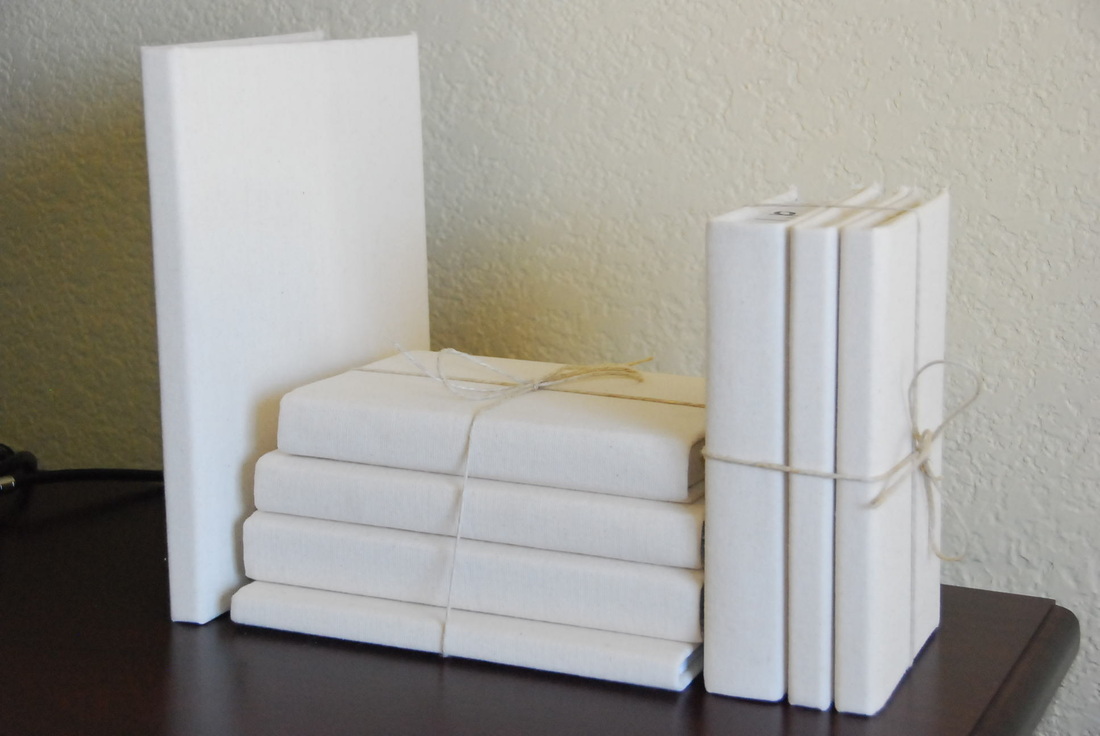
Step 18: The final touch, bundle it all together! I thought about this part when I was selecting books at McKays. They had many versions and sizes of the same types of books, so I picked ones I thought would go well together.
I grabbed some hemp twine I had around from my days of making those friendship bracelets we all thought were so cool in middle school. It worked perfectly for pulling these books together!
I grabbed some hemp twine I had around from my days of making those friendship bracelets we all thought were so cool in middle school. It worked perfectly for pulling these books together!
I made a table out of a reclaimed shipping pallet earlier in the year and used some galvanizes steel tubing from Lowe's for the legs. I also gave that to her and thought these books would look good on that table. Unfortunately I don't have a picture of the table. Maybe in the future? That reminds me that I need to make another (better) table out of reclaimed wood...
So, did it take a while? Yes. Was it worth it? Yes. Would I do it again? Likely.
Hope you found this post helpful or at least interesting!
So, did it take a while? Yes. Was it worth it? Yes. Would I do it again? Likely.
Hope you found this post helpful or at least interesting!
 RSS Feed
